
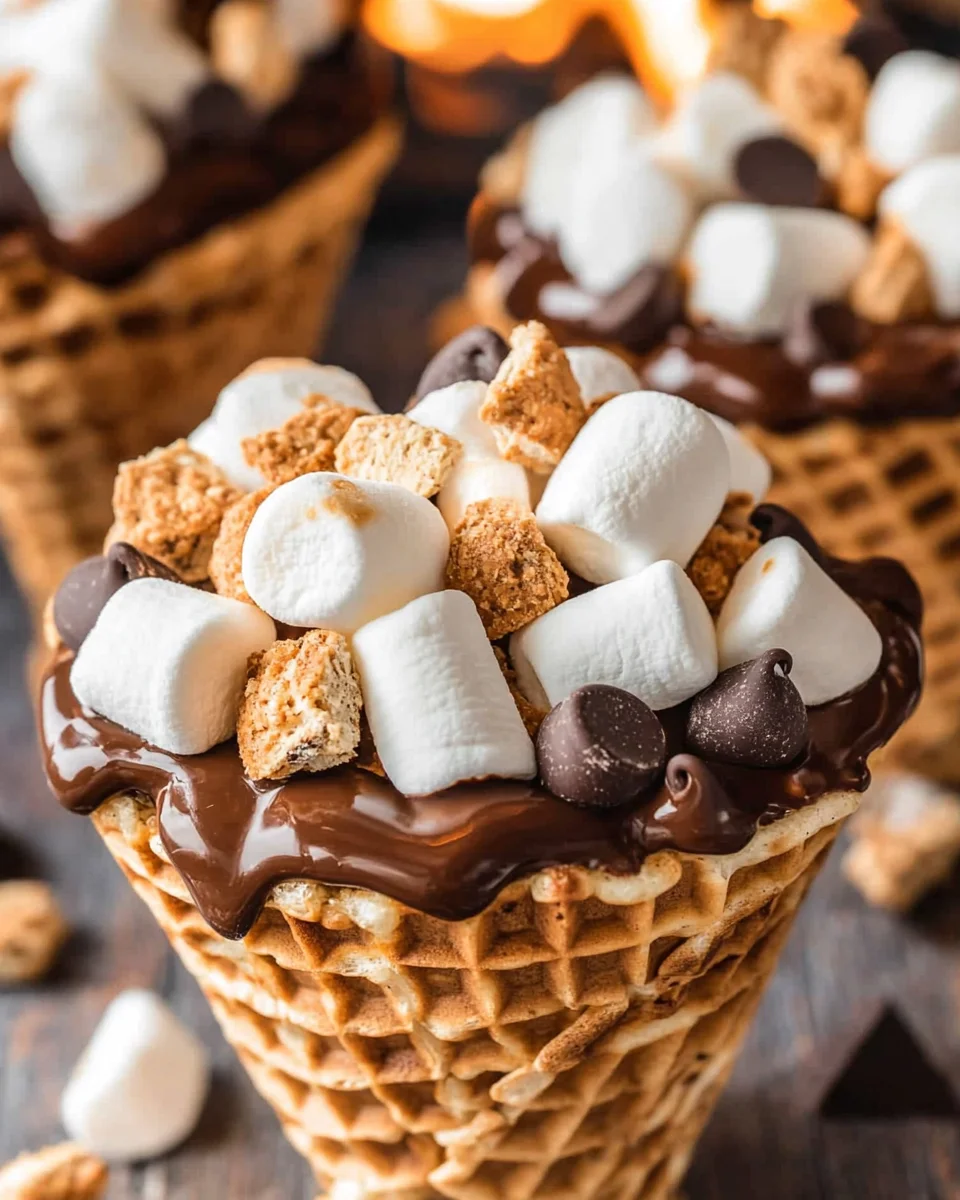
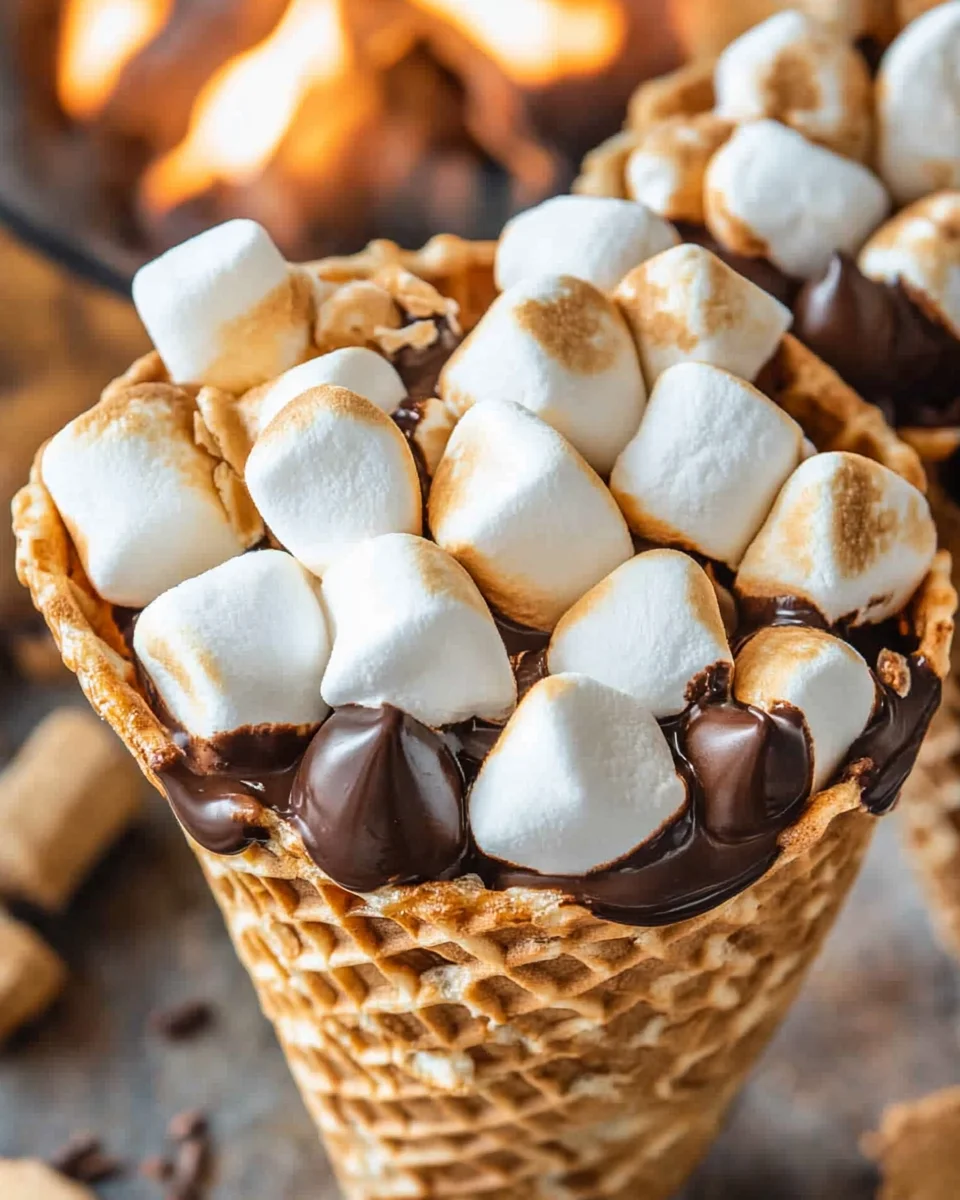
Whether you are camping, grilling, or simply enjoying a cozy day at home, S’Mores Cones are the perfect treat. These delightful cones combine the classic flavors of s’mores into a fun and easy-to-eat format. They are not only delicious but also versatile enough for any occasion, whether it’s a backyard barbecue or a campfire gathering. The combination of melty chocolate and gooey marshmallows encased in a crunchy cone is sure to please everyone.
Why You’ll Love This Recipe
- Quick and Easy: This recipe takes just 15 minutes from start to finish, making it perfect for last-minute gatherings.
- Fun for All Ages: Kids and adults alike will enjoy assembling their own cones, adding to the excitement of your event.
- Versatile Filling Options: Customize with your favorite chocolates, fruits, or toppings to create unique flavor combinations.
- Minimal Cleanup: With just cones and foil involved, cleanup is a breeze after indulging in these sweet treats.
- Ideal for Any Occasion: Whether it’s a summer party or winter campfire, S’Mores Cones fit right in.
Tools and Preparation
To successfully make S’Mores Cones, you’ll need some basic kitchen tools. Having everything ready will make the process smooth and enjoyable.
Essential Tools and Equipment
- Aluminum Foil
- Oven or Grill
- Baking Sheet (optional)
- Tongs
Importance of Each Tool
- Aluminum Foil: Essential for wrapping the cones to keep all the gooey goodness inside while they heat up.
- Oven or Grill: Provides the heat needed to melt the chocolate and marshmallows perfectly without burning them.
Ingredients
For the Cones
- 12 Sugar or Waffle Cones
For the Filling
- 1 bag Mini Marshmallows
- 12 oz Chocolate Chips
How to Make S’Mores Cones
Step 1: Fill Each Cone
- Start by taking your sugar or waffle cones.
- Fill each cone generously with mini marshmallows.
- Add chocolate chips on top of the marshmallows until they reach the top.
Step 2: Wrap in Aluminum Foil
- Take a piece of aluminum foil large enough to encase each cone completely.
- Wrap each filled cone tightly in foil, ensuring that no gaps remain.
Step 3: Heat Them Up
- Preheat your oven to 350°F (175°C) or prepare your grill for indirect heat.
- Place the wrapped cones on a baking sheet if using an oven.
- Heat for about 7–10 minutes until chocolate is melted and marshmallows are gooey.
Step 4: Unwrap and Enjoy
- Carefully remove the cones from the oven or grill using tongs.
- Unwrap them slowly as they will be hot.
- Dig in immediately while they’re warm and gooey!
Enjoy these delightful S’Mores Cones as a fun dessert that brings everyone together!
How to Serve S’Mores Cones
S’mores cones are a delightful twist on the classic campfire treat, perfect for any gathering. Here are some fun serving suggestions to elevate your dessert experience.
For Kids
- Decorate with Sprinkles: Let kids add colorful sprinkles to their cones before wrapping them up.
- Mini Chocolate Bars: Instead of chocolate chips, use mini chocolate bars for a richer flavor in each cone.
At a Party
- Build-Your-Own Station: Set up a station with various toppings like nut butters and fruit for guests to customize their cones.
- Themed Cones: Create different themes, such as tropical (add coconut flakes) or peanut butter (add peanut butter cups).
For an Outdoor Event
- Serve with Fresh Fruit: Pair cones with fresh strawberries or bananas for a refreshing contrast.
- Drinks Pairing: Offer drinks like iced tea or lemonade to balance the sweetness of the s’mores.
Family Movie Night
- Warm Chocolate Dipping Sauce: Serve with a side of warm chocolate sauce for extra indulgence.
- Cozy Blanket Setup: Create a cozy atmosphere with blankets and pillows for an inviting movie night.
How to Perfect S’Mores Cones
Making perfect s’mores cones requires a bit of attention to detail. Follow these tips to ensure delicious results every time.
- Use Fresh Ingredients: Choose fresh marshmallows and high-quality chocolate chips for the best flavor.
- Avoid Overfilling: Don’t pack the cones too tightly; leave some space for the ingredients to melt without spilling out.
- Wrap Securely: Make sure the aluminum foil is tightly wrapped around each cone to prevent leaks during cooking.
- Check Doneness: Keep an eye on the cones while they cook, as ovens and grills may vary in heat. Look for melted marshmallows and gooey chocolate!
- Let Cool Slightly: After removing from heat, let the cones cool for a minute before unwrapping—this allows flavors to meld beautifully.
Best Side Dishes for S’Mores Cones
To complement your s’mores cones, consider serving some tasty side dishes. Here are some great options:
- Fresh Fruit Salad: A mix of seasonal fruits adds freshness and balances the sweetness of the cones.
- Chocolate-Dipped Pretzels: Salty pretzels dipped in chocolate provide a satisfying crunch alongside your sweet treat.
- Vanilla Ice Cream: A scoop of creamy vanilla ice cream pairs perfectly with warm s’mores cones.
- Graham Crackers: Classic graham crackers can serve as an additional crunchy element if guests want more s’mores action.
- Nutella Fruit Dip: Offer Nutella as a dip for fresh fruits or even extra graham crackers for added indulgence.
- Whipped Cream: Serve whipped cream on the side so everyone can add it on top of their warm s’mores cone creations.
Common Mistakes to Avoid
When making S’Mores Cones, it’s easy to run into a few common pitfalls. Here are mistakes to be mindful of to ensure your cones turn out perfectly every time.
-
Overfilling the cones: Packing too many marshmallows or chocolate chips can cause the cones to overflow. Aim for a balanced fill to keep the ingredients contained.
-
Not wrapping properly: If the cones aren’t wrapped tightly in aluminum foil, the heat may not distribute evenly. Make sure to seal them well to create a cozy cooking environment.
-
Using the wrong heat source: Cooking S’Mores Cones over an open flame can burn the outside while leaving the inside cold. Opt for an oven or grill set at 350°F for even heating.
-
Skipping the cooling step: After cooking, it’s tempting to dig right in. However, contents will be very hot. Let them cool briefly before unwrapping to avoid burns.
-
Choosing low-quality cones: Using flimsy or stale cones can lead to breakage during filling and cooking. Select sturdy sugar or waffle cones for best results.
Storage & Reheating Instructions
Refrigerator Storage
- Store leftover S’Mores Cones in an airtight container.
- They can last up to 3 days in the refrigerator.
- Be sure to label the container with the date for freshness tracking.
Freezing S’Mores Cones
- Wrap each cone individually in plastic wrap before placing them in a freezer-safe bag.
- S’Mores Cones can be frozen for up to 2 months.
- Thaw in the refrigerator before reheating for best results.
Reheating S’Mores Cones
-
Oven: Preheat your oven to 350°F and place wrapped cones on a baking sheet. Heat for about 10 minutes.
-
Microwave: Unwrap the cone and place it on a microwave-safe plate. Heat for 15-20 seconds; watch carefully as they may get hot quickly.
-
Stovetop: Place wrapped cones in a pan over low heat. Rotate occasionally until warm, usually about 5 minutes.
Frequently Asked Questions
What are S’Mores Cones?
S’Mores Cones are a fun twist on traditional s’mores, featuring marshmallows and chocolate chips stuffed into a cone and heated until gooey and delicious.
How do I customize my S’Mores Cones?
You can add different candies like peanut butter cups or caramel bits for extra flavor. Experimenting with various fillings makes this recipe versatile!
Can I make S’Mores Cones ahead of time?
Yes! You can prepare them ahead of time, store them in the refrigerator or freezer, and reheat when you’re ready to enjoy.
Are S’Mores Cones kid-friendly?
Absolutely! Kids love helping fill their own cones with their favorite ingredients, making it a fun activity for all ages.
What is the best way to serve S’Mores Cones?
Serve them warm directly from the grill or oven with a side of fresh fruit for a delightful dessert experience that everyone will enjoy.
Final Thoughts
S’Mores Cones offer an exciting and nostalgic treat that combines convenience with creativity. Perfect for gatherings, camping trips, or cozy nights at home, these cones allow for endless customization options. Try out different fillings and toppings—your imagination is your only limit! Enjoy this easy dessert that brings smiles to faces young and old alike.

S’Mores Cones
- Total Time: 15 minutes
- Yield: Makes 12 servings 1x
Description
S’Mores Cones are a delightful twist on the classic campfire treat, perfect for any occasion—be it a backyard barbecue or a cozy movie night at home. These fun and easy-to-make cones combine crunchy sugar or waffle cones with gooey marshmallows and rich chocolate chips, creating an irresistible dessert that brings joy to both kids and adults alike. In just 15 minutes, you can whip up these sweet treats that are not only delicious but also customizable with your favorite fillings. Whether you’re making them for a crowd or just for yourself, S’Mores Cones are sure to satisfy your sweet tooth!
Ingredients
- 12 Sugar or Waffle Cones
- 1 bag Mini Marshmallows
- 12 oz Chocolate Chips
Instructions
- Fill each cone generously with mini marshmallows, then top with chocolate chips until full.
- Wrap each filled cone tightly in aluminum foil.
- Preheat your oven to 350°F (175°C) or prepare your grill for indirect heat. Place wrapped cones on a baking sheet if using an oven.
- Heat for about 7–10 minutes until chocolate is melted and marshmallows are gooey.
- Carefully remove the cones using tongs, unwrap slowly, and enjoy immediately while warm.
- Prep Time: 5 minutes
- Cook Time: 10 minutes
- Category: Dessert
- Method: Baking
- Cuisine: American
Nutrition
- Serving Size: 1 cone (75g)
- Calories: 320
- Sugar: 26g
- Sodium: 60mg
- Fat: 12g
- Saturated Fat: 7g
- Unsaturated Fat: 4g
- Trans Fat: 0g
- Carbohydrates: 49g
- Fiber: 1g
- Protein: 4g
- Cholesterol: 0mg
Leave a Comment